That sinking feeling when you spot a water stain near your sliding door can make you think the worst. But before you start budgeting for a major repair, take a breath. The culprit is often a simple maintenance issue you can handle in an afternoon, like clogged tracks or worn-out weather stripping. These small problems can let in a surprising amount of water, but they don’t require a complete overhaul. This guide is designed to start with the easiest solutions first. We’ll walk you through the most common and straightforward ways to fix leaky sliding patio door problems, helping you solve the issue without unnecessary stress or expense.
Key Takeaways
- Focus on Drainage and Seals First: Most leaks are caused by clogged weep holes in the door track or worn-out weather stripping. Before attempting complex repairs, a thorough cleaning and a close inspection of the seals will often solve the problem and should always be your first step.
- A Successful DIY Fix Depends on Quality Materials: The effectiveness of your repair hinges on using the correct supplies. Always choose a high-quality, weatherproof silicone sealant over standard caulk and find an exact match for any replacement weather stripping to create a durable, watertight seal.
- Distinguish Between Simple Repairs and Structural Failure: A persistent leak after basic fixes, a warped frame, or moisture trapped between glass panes are signs of a deeper issue. Knowing when a problem is beyond your scope is key to preventing serious water damage to your floors and walls.
Why Is Your Sliding Patio Door Leaking?
Finding a puddle of water near your sliding patio door after a storm is a frustrating discovery. Before you can fix the leak, you need to play detective and figure out where the water is coming from. Most leaks are caused by a few common culprits, from simple maintenance issues you can handle yourself to bigger problems that might need a professional eye. Understanding the root cause is the first step toward a dry, damage-free floor. Let’s walk through the most common reasons your sliding door might be letting rain in, so you can pinpoint the problem and get it solved.
Poor Installation or Misalignment
One of the most common reasons for a leaky sliding door is a poor initial installation. If the door frame wasn’t installed perfectly level and square, it won’t seal correctly against the jamb. Over time, even a well-installed door can become misaligned as your house naturally settles. This shifting can create tiny gaps between the door and the frame—just enough for wind-driven rain to find its way inside. You might notice the door is harder to slide or that the gap along the edges looks uneven. A misaligned door not only leaks but can also compromise your home’s security, making professional door repair and installation a smart investment.
Worn-Out Weather Stripping and Seals
Weather stripping is the unsung hero that creates an airtight and watertight seal around your sliding door. These flexible rubber or foam strips line the edges of the door and frame, but they don’t last forever. Constant exposure to sun, rain, and temperature changes causes them to become brittle, cracked, or compressed over time. Once the weather stripping is compromised, it can no longer block water effectively. Take a close look at the seals around your door. If you see visible cracks, peeling sections, or feel a draft, it’s a clear sign that your weather stripping has failed and needs to be replaced.
Clogged Tracks and Weep Holes
Your sliding door’s track is designed with a clever drainage system to manage rainwater. Small, often-overlooked openings called weep holes are built into the bottom of the track to allow water to drain back outside. The problem is, these tracks and weep holes are magnets for dirt, leaves, pet hair, and other debris. When they get clogged, water has nowhere to go. It pools in the track until it eventually overflows and seeps into your home. This is one of the easiest problems to check for and often the simplest to fix with a thorough cleaning.
Broken Rollers or Damaged Hardware
The rollers are the small wheels at the bottom of your sliding door that allow it to glide smoothly along the track. If these rollers become worn, cracked, or misaligned, they can cause the door to sag or sit unevenly in the frame. When this happens, the door can’t form a tight seal when it’s closed, leaving it vulnerable to leaks. A door that’s difficult to open or makes a grinding noise is a good indicator that the rollers are failing. Addressing damaged hardware is crucial, as a poorly sealed door can lead to significant water damage and higher energy bills.
Is Your Sliding Door Leaking? Here’s How to Tell
A leaky sliding door can be sneaky. You might not notice it until you’re dealing with a warped floor or a musty smell you just can’t place. The good news is that if you know what to look for, you can catch the problem early and prevent major headaches. A little detective work now can save you a lot of time, money, and stress later. Think of it as a regular check-up for one of the most-used entryways in your home. Keeping your doors in good shape is a key part of your home’s overall health and security. Before you can fix the leak, you have to find it. Let’s walk through the four tell-tale signs that water is getting in where it shouldn’t be.
Spotting Puddles, Water Stains, or Mold
This is the most obvious clue. After a rainstorm, check the floor and wall area around your sliding door. Do you see any small puddles, damp spots, or discoloration on the floorboards or carpet? Water stains on the wall or baseboard are another dead giveaway. Don’t ignore a musty smell, either—it often points to hidden moisture. Leaking sliding glass doors can cause serious problems like damaged floors and mold growth, so it’s important to act quickly if you spot any of these signs. Catching it early prevents a small issue from turning into a major repair project.
Feeling for Drafts and Cold Spots
On a windy or cold day, run your hand along the edges of the sliding door frame. Can you feel a draft? Even a slight breeze indicates that the seal isn’t airtight, which means water can likely get in just as easily as air can. Cold spots on the floor near the door are another sign of a poor seal. If you feel drafts or notice the area is significantly colder, the weather stripping is probably the culprit. Over time, it can become brittle, cracked, or compressed, losing its ability to keep the elements out.
Noticing Condensation Between the Panes
A bit of fog on the inside of the glass on a cold morning is normal. But if you see condensation, fog, or moisture trapped between the two panes of glass, you have a problem. This means the seal on the insulated glass unit has failed. When that seal breaks, it not only lets moisture in but also allows the insulating gas to escape, making your door much less energy-efficient. An improperly sealed glass unit can also let water leak in from the top of the pane, so this is a sign you shouldn’t ignore.
Finding Visible Cracks or a Warped Frame
Take a close look at the door itself. Do you see any cracks in the glass or the frame? Is the frame warped, bent, or pulling away from the wall? These are serious issues that go beyond a simple seal replacement. A cracked frame compromises the entire structure of the door, creating a clear path for water to enter. If the door itself is cracked or broken, it often needs a professional touch. A full door repair and installation might be necessary to ensure your home is secure and protected from the elements.
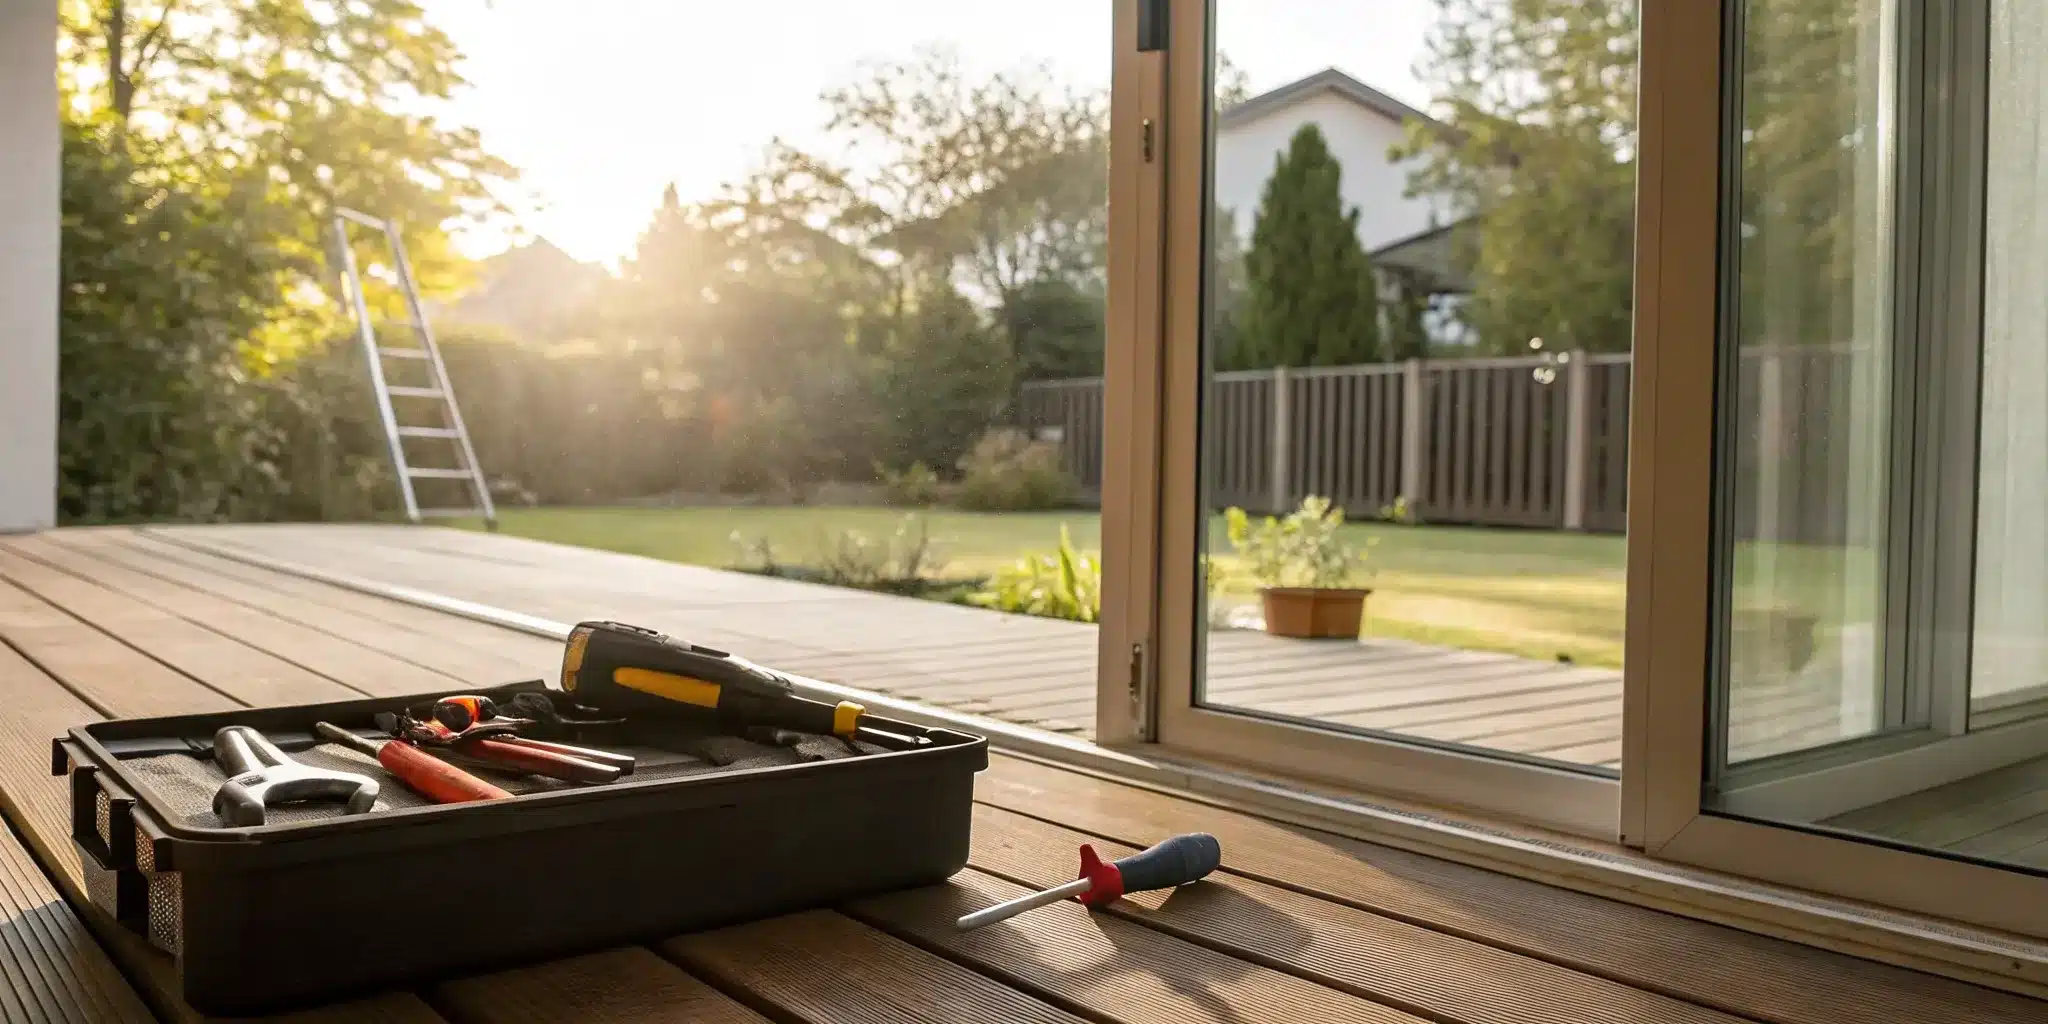
What You’ll Need for the Fix
Before you roll up your sleeves, let’s get your supplies in order. Nothing stalls a DIY project faster than realizing you’re missing a crucial tool or part mid-repair. Gathering everything you need upfront will make the entire process smoother and help you get a professional-quality result. Think of it as your pre-project checklist for success.
Your Essential Toolkit
You don’t need a professional workshop, but a few key tools will make this job much easier. Most of these are probably already in your home, but it’s a good idea to check before you start taking things apart. Having the right tool for each step prevents you from accidentally damaging the door or frame, which can turn a small repair into a bigger headache. A well-equipped toolkit helps you disassemble, repair, and reassemble your sliding door without any hitches.
Here’s what you should have on hand:
- 4-in-1 screwdriver
- Allen wrench
- Corded drill
- Pry bar
- Rags
- Screen roller
- Utility knife
The Right Replacement Parts
For most leaky sliding doors, the main culprit is worn-out weather stripping. This is the seal that runs along the edges of your door to keep wind and water out. When it gets old, it can crack, compress, or peel away, creating the perfect entry point for leaks. You’ll need to get the right replacement weather stripping, which usually comes in foam, felt, or rubber. A great tip is to cut a small piece of the old stripping and take it with you to the hardware store to find an exact match. You’ll also want a sharp utility knife or scissors to cut the new stripping to size.
How to Choose the Best Sealant and Weather Stripping
This is where you don’t want to cut corners. Using a high-quality sealant is the secret to a long-lasting, waterproof fix. For any window or door project, a weatherproof sealant like Dow-Corning is an excellent choice. It’s important to avoid generic painter’s caulk or basic acrylic sealants, as they aren’t designed to withstand the elements and will likely fail, leaving you with the same leaky problem. Getting the materials right is a core part of any professional door repair and installation, and it should be for your DIY project, too. Investing in the right products ensures your hard work pays off.
Your Step-by-Step Guide to Fixing a Leaky Sliding Door
Ready to tackle that leak? Great! Fixing a leaky sliding door is often a very manageable DIY project. With a little patience and the right approach, you can solve the problem and protect your home from water damage. We’ll walk through four key steps, from simple cleaning to making minor adjustments, that address the most common causes of leaks.
Before you begin, gather your tools and give yourself plenty of time so you don’t have to rush. The goal is to be thorough. By following these instructions, you can create a better seal and keep the rain outside where it belongs. And remember, if you get started and realize the problem is bigger than you thought—like a warped frame or significant hardware damage—our team is always here to help with professional door repair and installation.
Step 1: Clean the Door Tracks and Weep Holes
First things first: let’s clear out the gunk. Your sliding door track is a magnet for dirt, leaves, and other debris, which can block the path for water to drain away from your home. Start by vacuuming the track thoroughly. Then, use a stiff brush and a cloth with a mild cleaning solution to scrub away any remaining grime.
Pay special attention to the weep holes—small holes or slots on the exterior bottom of the track designed to let water escape. If these are clogged, water will have nowhere to go but inside. Use a pipe cleaner, a small wire, or a can of compressed air to clear them out completely. This simple cleaning step alone often solves the leaking issue.
Step 2: Inspect and Replace the Weather Stripping
Next, take a close look at the weather stripping. This is the fuzzy or rubbery seal that runs along the edges of the door panel to block out drafts and water. Over time, it can become cracked, brittle, or compressed, losing its ability to create a tight seal. Run your hand along the stripping to feel for damage or gaps.
If it looks worn out, it’s time for a replacement. You can find new weather stripping at most hardware stores. Carefully pull off the old material—you may need a putty knife if it’s glued on. Clean the surface, then cut the new stripping to size and press it firmly into place. This will restore the snug fit your door needs to keep water out.
Step 3: Adjust the Door Alignment and Rollers
If your door doesn’t close evenly or you see a visible gap at the top or bottom, it’s likely misaligned. An improperly aligned door won’t meet the frame correctly, leaving a perfect entry point for rain. The fix is usually in the rollers at the bottom of the door. You should see small access holes on the front or edge of the door near the bottom.
Inside these holes are adjustment screws. Using a screwdriver, turn the screws to raise or lower that side of the door. Make small, quarter-turn adjustments on each side, checking the alignment after each one, until the door sits squarely in the frame and closes smoothly against the weather stripping.
Step 4: Seal Gaps Around the Door Frame
Finally, inspect the exterior of your door frame where it meets the wall of your house. The sealant, or caulk, in this joint can crack and pull away over time, creating a pathway for water to seep in behind the frame. Look for any visible gaps or deteriorating caulk.
If you find any, you’ll need to reseal it. Use a utility knife or caulk removal tool to scrape out the old, damaged sealant. Clean the area thoroughly to ensure the new sealant will adhere properly. Apply a continuous bead of high-quality, exterior-grade waterproof silicone caulk to fill the gap completely. This final step ensures the entire door unit is sealed off from the elements.
Common DIY Mistakes to Avoid
Tackling a leaky sliding door on your own can feel empowering, but a few common missteps can turn a simple fix into a bigger headache. Knowing what not to do is just as important as knowing the right steps to take. By avoiding these frequent DIY blunders, you can ensure your repair is effective and long-lasting, saving you from future water damage and frustration. Let’s walk through the mistakes that are easy to make but also easy to avoid.
Using the Wrong Sealant or Parts
It’s tempting to grab whatever caulk you have lying around, but this is one of the biggest mistakes you can make. Your sliding door is constantly exposed to the elements, and it needs a sealant designed for the job. Standard acrylic or painter’s caulk won’t create a durable, waterproof barrier and will likely fail quickly, leaving you right back where you started. Always opt for a high-quality, weatherproof silicone sealant made specifically for windows and doors. The same goes for replacement parts; using a generic version might not create the tight seal you need. Getting the right materials is the foundation of a successful door repair.
Forcing Misaligned Components
If your door feels stuck or doesn’t close smoothly, your first instinct might be to give it a good shove. Please don’t! Forcing a misaligned door can do serious damage to the rollers, track, and frame. Misalignment often happens over time as a house settles, creating gaps where water can sneak in. While you can make minor roller adjustments, trying to force components that are clearly out of place will only make the problem worse. If the door is visibly crooked or requires significant effort to move, it’s a sign of a deeper issue that needs a more delicate touch.
Forgetting to Clear the Weep Holes
This one is so simple it’s often completely overlooked. At the bottom of your sliding door track, there are small slots called weep holes. Their entire job is to drain rainwater out and away from your home. Over time, these little drains get clogged with dirt, leaves, and other debris. When they’re blocked, water has nowhere to go but inside. Before you start any other repairs, take a moment to find and clear these holes with a wire or a can of compressed air. You might be surprised to find that this quick, easy step solves your leaking problem entirely.
Overlooking Deeper Structural Damage
Sometimes, a leak isn’t just a leak—it’s a symptom of a bigger problem. If you’ve replaced the seals, cleared the weep holes, and the door still lets water in, you might be dealing with more than a simple DIY fix can handle. Issues like broken rollers, a warped frame, or a compromised drainage system within the door assembly require a professional diagnosis. Ignoring these signs can lead to significant water damage to your floors and walls. If you suspect the problem is more than skin deep, it’s always best to call in a professional who can handle complex door repair and installation to protect your home.
How to Prevent Future Leaks
After you’ve fixed the immediate leak, the last thing you want is a repeat performance during the next New York rainstorm. The good news is that a little proactive care can make a huge difference. By creating a simple maintenance schedule, you can catch small issues before they turn into major headaches and keep your sliding patio door in great shape for years to come. Think of it as a small investment of your time that protects your home and your peace of mind. These next few steps will show you exactly what to do to keep your home dry and secure.
Create a Simple Maintenance Routine
A solid maintenance routine doesn’t have to be complicated or time-consuming. The most important task is to keep the door’s drainage system clear. At least once a month, take a few minutes to vacuum out the door track and wipe it down with a damp cloth. Pay special attention to the weep holes—those small holes on the exterior bottom of the frame. They’re designed to let water escape, but they can easily get clogged with dirt, leaves, and other debris. Use a pipe cleaner or a small brush to gently clear them out. This simple step ensures that rainwater flows away from your door instead of pooling and seeping inside.
Use This Seasonal Inspection Checklist
A few times a year, especially as the seasons change, it’s a good idea to give your sliding door a more thorough inspection. This quick check-up can help you spot potential problems early.
Here’s what to look for:
- Weather Stripping: Look closely at the seals around your door. Are they cracked, brittle, or pulling away from the frame? If you feel a draft or see condensation forming between the panes, it’s a clear sign the weather stripping is failing and needs to be replaced.
- Drainage Channels: Double-check that the tracks and weep holes are completely clear. After autumn, they can get packed with fallen leaves, so it’s a great time for a deep clean to prepare for winter storms.
- Frame and Sealant: Examine the caulk around the exterior of the door frame. If it’s cracked or peeling, water can get in.
Pro Tips for Long-Term Care
For lasting protection, a few extra steps can go a long way. If you noticed during your inspection that the weather stripping is looking worn, don’t wait for a leak to happen. Replacing it is a straightforward and affordable fix that makes a massive difference in preventing both water and drafts. However, it’s just as important to know when a problem is beyond a simple DIY fix. If you see signs of a warped frame, broken rollers, or suspect there’s structural damage, it’s best to call in an expert. Attempting to fix these larger issues yourself can often lead to more damage. A professional door repair and installation service can diagnose the root cause and ensure the job is done right.
Repair or Replace? When It’s Time for a New Door
You’ve cleaned the tracks, checked the seals, and done everything right, but the leak persists. While many sliding door issues are fixable, there comes a point where patching things up is no longer the best solution. Deciding between another repair and a full replacement can feel like a big step, but sometimes it’s the smartest move for your home’s security, energy efficiency, and your peace of mind. Knowing when to call it quits on an old door can save you from future headaches and costly damage. If your door is constantly causing problems, it might be telling you its time is up. Let’s walk through the key signs that point to a replacement and why it can be a great long-term investment.
Key Signs You Need a Replacement
Some problems go beyond what a simple DIY fix can handle. If you see water coming directly through the door frame or glass seals, that’s a major red flag. This kind of leak can lead to serious water damage in your subfloor and walls, creating a perfect environment for mold to grow. Other clear signs include a warped or rotting frame, which compromises the door’s structural integrity and security. If you notice condensation trapped between the glass panes, it means the seal has failed, and the door’s insulating properties are gone. At this point, you’re not just dealing with a leak; you’re dealing with a door that can no longer do its job effectively.
Comparing the Costs: Repair vs. New
It’s tempting to opt for a repair because it seems cheaper upfront, but it’s important to think long-term. If your sliding door is old, poorly designed, or requires frequent fixes, you might be throwing good money after bad. Constant repairs can add up quickly, eventually costing you more than a new installation. A brand-new door is a solid investment in your property. It not only solves the leak for good but also improves your home’s value and security. When you’re weighing the options, consider getting a professional quote for a full door repair and installation to see how the numbers stack up against your recurring repair bills.
The Energy-Saving Perks of a Modern Door
An old, leaky door isn’t just letting water in—it’s also letting your heating and cooling out. Modern sliding doors are built with far superior technology, including double- or triple-pane glass, low-emissivity (Low-E) coatings, and advanced weather stripping that creates an airtight seal. Upgrading can significantly reduce drafts and improve your home’s insulation, which you’ll notice on your energy bills. While replacing old weather stripping on an existing door helps, it can’t compete with the efficiency of a new unit. A modern door is a worthwhile investment that keeps your home comfortable, quiet, and protected from the elements.
What to Do If the Leak Persists
So, you’ve tried the basics, but that stubborn leak is still hanging around. It’s frustrating, but don’t throw in the towel just yet. Some water issues are just a bit more complex and require a deeper look. If you’ve sealed the gaps and cleaned the tracks but water is still finding its way inside, it’s time to investigate a few more advanced possibilities.
These next steps are a bit more involved, but they often solve the most persistent leaks. However, if you start to feel like you’re in over your head or if the problem seems to be getting worse, it’s always okay to pause and call for backup. The goal is to fix the leak for good, not create a bigger headache.
Advanced Fixes for Stubborn Leaks
First, take a closer look at the weep holes. These are small but mighty openings in the bottom of the door track designed to let water drain out. Over time, they can get clogged with dirt, debris, or even old caulk. Use a small wire or a can of compressed air to clear them out completely. If your track doesn’t seem to have enough, some people carefully drill a few more to improve drainage. Also, check the ground outside. The patio or deck should slope away from your house, guiding water away from the door, not toward it. If the grading is off, water will pool against the door and eventually find a way in.
When to Call a Professional for Help
Sometimes, a leak is a symptom of a bigger problem that a DIY fix just can’t solve. If you notice cracks in the door frame, see signs of structural damage, or if the door is difficult to open, close, or lock, it’s time to call an expert. These issues can compromise your home’s security and energy efficiency. Forcing misaligned parts can cause even more damage. A professional can correctly diagnose the root cause, whether it’s a broken drainage system or a door that was improperly installed from the start. Getting professional door repair not only fixes the leak but also ensures your door is secure and functions smoothly for years to come.
Related Articles
- Securing Sliding Glass Doors For Better Glass Door Security
- The Ultimate Guide To Storefront Door Installation
- A Guide To Commercial Glass Door Installation
- A Step-by-Step Guide To Commercial Storefront Door Installation
- Fast & Affordable Locksmith Services (Guide)
- Need A Locksmith Near Me? How To Find The Closest Help In Upper East Side
Frequently Asked Questions
Can I really fix a leaky sliding door myself? Absolutely. Many common leaks are caused by simple issues you can definitely handle. Things like clogged tracks, blocked weep holes, or worn-out weather stripping are very manageable DIY projects. If you follow the steps to clean the drainage channels and replace the seals, you can often solve the problem in an afternoon. The key is knowing when the issue is more complex, such as a warped frame or broken rollers, which is when it’s best to call a professional.
I cleaned the tracks, but my door is still leaking. What should I check next? It’s frustrating when the simplest fix doesn’t work, but don’t worry. The next place to look is the weather stripping. Run your hand along all the seals to feel for drafts, or look for visible cracks and brittle spots. If the seals seem fine, check the door’s alignment. A door that doesn’t sit squarely in its frame won’t seal properly, and you can often correct this by adjusting the roller screws at the bottom of the door.
How can I tell if the problem is the door itself or the installation? A good way to tell is by looking for signs of structural failure. If you see condensation trapped between the panes of glass, the seal on the glass unit has failed, and that’s a problem with the door itself. A warped or rotting frame also points to a failing door. On the other hand, if the frame is pulling away from the wall or you see cracks in the caulk around the exterior, the issue might stem from the original installation.
Is a small puddle after a heavy storm really a big deal? It’s easy to dismiss a little water, but it’s definitely something you want to address. That small puddle is a sign that your door’s defenses have been breached. Over time, that moisture can seep into your subfloor, causing wood to rot, flooring to warp, and creating a perfect environment for mold and mildew to grow behind your walls. Tackling the leak now prevents a much bigger and more expensive problem down the road.
What kind of sealant should I use around the door frame? This is such an important detail for a lasting repair. You should always use a 100% silicone sealant that is specifically rated for exterior use on windows and doors. Avoid using standard painter’s caulk or all-purpose acrylic sealants. They simply aren’t flexible or durable enough to withstand temperature changes and direct exposure to rain, and they will likely crack and fail, leaving you with the same leak.
Need professional help in NYC? Contact Golden Key Locksmith NYC for Commercial Door Repair or Metal Door Repair. Available 24/7 across Manhattan and all NYC boroughs.