Your front door’s security is only as strong as its weakest component, and often, that’s the latch. It’s the piece of hardware that does the heavy lifting every single day, and over time, it can wear out. Instead of waiting for it to fail, why not be proactive? Learning how to install a swing door latch is a valuable skill that puts you in control of your home’s first line of defense. This guide is designed to empower you with the confidence and knowledge to get the job done right, covering everything from removing the old parts to testing your new, secure installation.
Key Takeaways
- Prioritize precise measurements: Your latch’s security and function depend on perfect alignment. Take the time to measure carefully and mark your drill points accurately before you start to ensure the latch and strike plate line up correctly.
- Test and adjust for a smooth close: A secure latch shouldn’t require force. After installation, test the door multiple times and make small adjustments to the strike plate’s position until the latch engages effortlessly.
- Know the limits of a DIY fix: A new latch can’t solve underlying problems like a sagging door or a warped frame. If your installation issues point to a bigger problem, calling a professional ensures the root cause is fixed for lasting security.
What Is a Swing Door Latch (and Why You Might Need One)
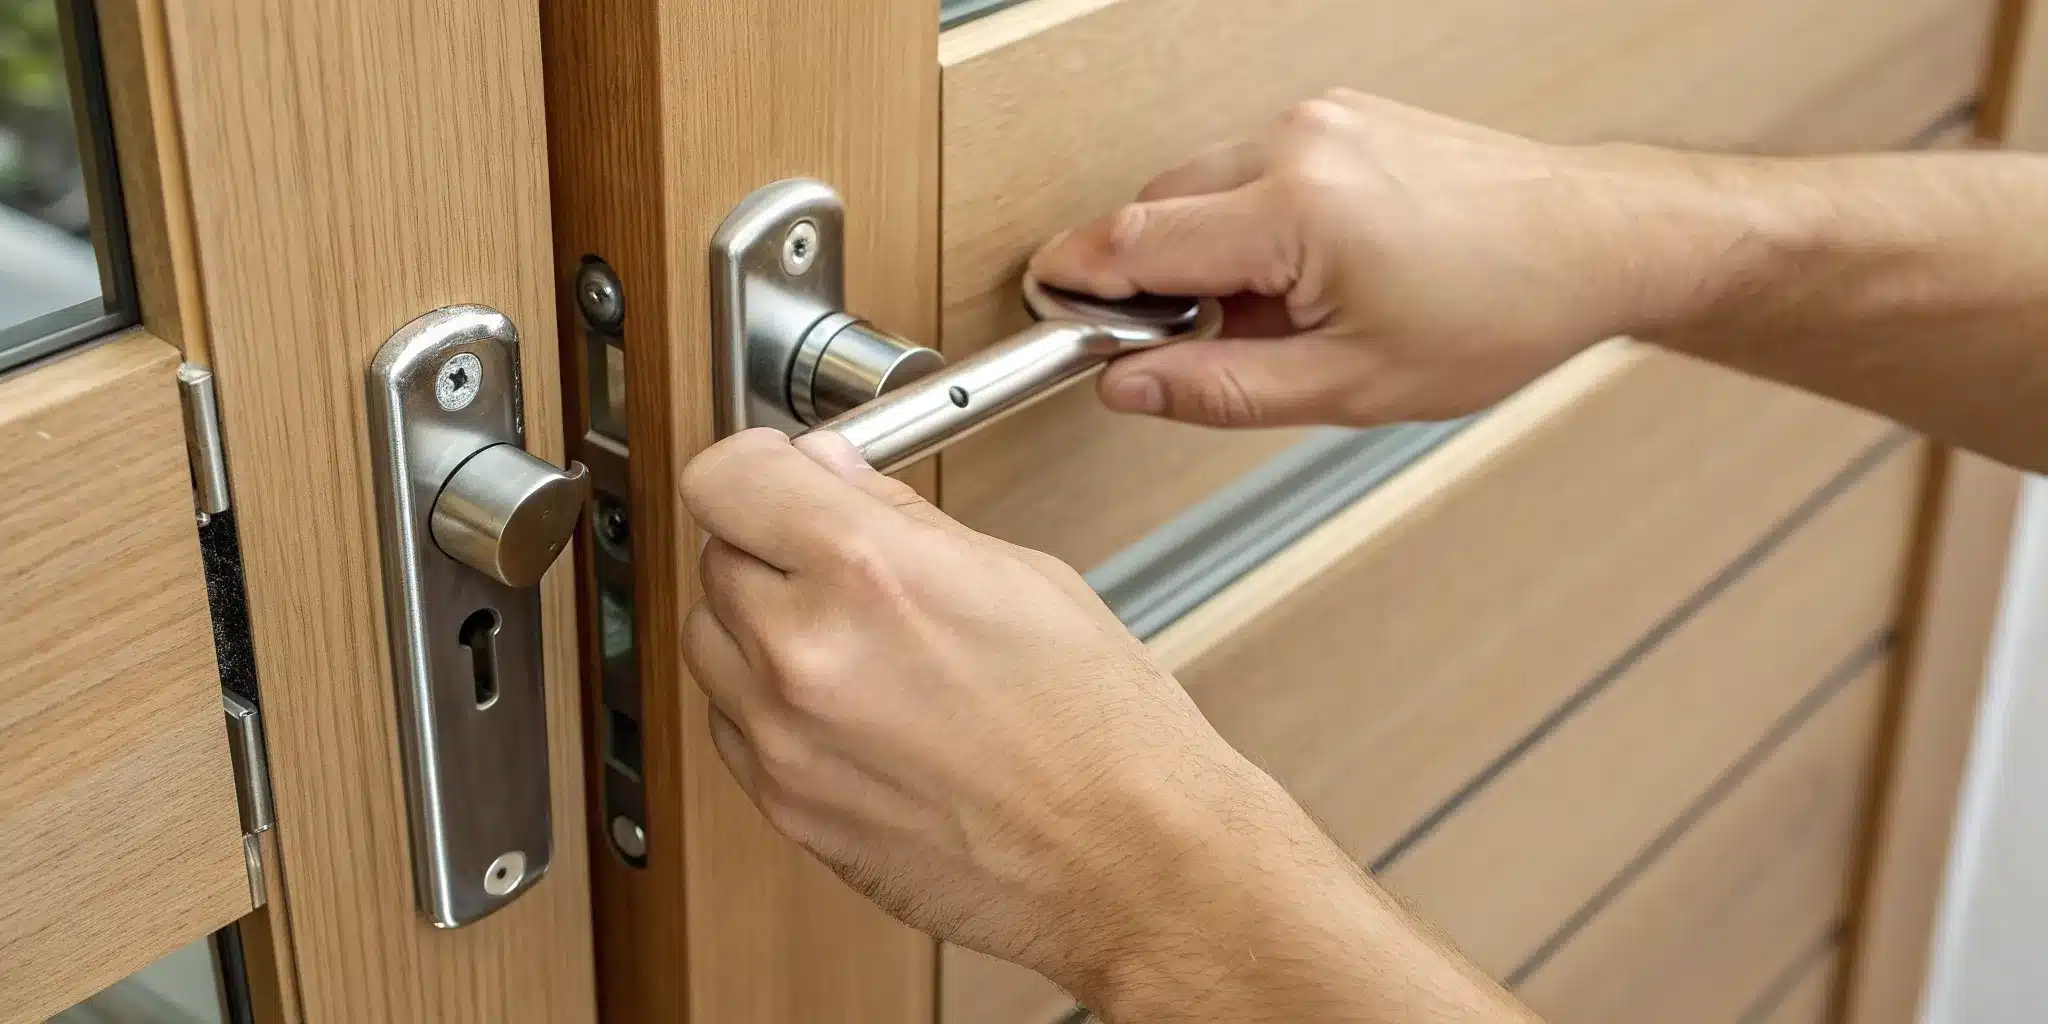
When you think about your door, you probably picture the handle or the deadbolt. But the unsung hero that keeps your door securely shut is the latch. A swing door latch is the mechanism that extends from the edge of the door into the frame, holding it closed until you turn the knob or handle. It’s the simple “click” you hear that lets you know your door is shut. This small piece of hardware is essential for both security and privacy, whether you’re in a brownstone in Brooklyn or a high-rise in Manhattan.
Understanding your door latch is the first step toward making sure your home or business is secure. A weak or improperly installed latch can be a significant vulnerability. On the other hand, a high-quality, well-fitted latch provides peace of mind and smooth daily operation. It’s one of those things you don’t think about until it stops working correctly. If your door doesn’t close properly or feels loose, the latch is often the culprit. Upgrading or repairing it is a straightforward way to improve your property’s first line of defense.
Exploring Different Types of Latches
The term “door latch” covers a wide range of hardware, each designed for different needs. The most common type you’ll find is the spring latch, which uses a spring-loaded bolt that retracts when you turn the handle. For more robust security, you have deadbolts, which don’t rely on a spring and must be manually locked with a key or thumbturn. Then there are mortise locks, which combine the latch and deadbolt into a single, more complex system often seen in older NYC apartments and commercial buildings. The right choice depends on your door type and the level of security you need for your residential locksmith services.
The Perks: Better Security and Convenience
A properly installed swing door latch does more than just keep your door closed—it enhances your security. A good latch ensures there are minimal gaps between the door and the frame, making it much more difficult for someone to pry the door open. This tight fit is a simple yet effective deterrent against break-ins. Beyond security, these latches are incredibly convenient. They are typically easy to install, making them a popular choice for quick repairs or security upgrades. A functional latch means your door opens and closes smoothly every time, which is a small convenience that makes a big difference in your daily routine. For a seamless upgrade, professional door repair and installation can ensure everything fits perfectly.
Gather Your Tools and Materials
Before you start unscrewing anything, let’s get organized. Having all your tools and materials laid out and ready to go is the secret to a smooth, frustration-free installation. Think of it as your pre-project checklist. A few minutes of prep work now will save you from making multiple trips to the garage or hardware store later. It also helps ensure the job gets done right the first time.
We’ll break this down into two parts: the tools you’ll need to do the work and the actual hardware you’ll be installing. Make sure you have everything on hand before moving on to the first step.
Your Essential Tool Checklist
You don’t need a professional-grade workshop for this project, just a few basic items. Most of these are probably already in your toolbox.
Here’s what you should have ready:
- A power drill
- Drill bits
- A screwdriver (Phillips head or flathead, depending on the screws)
- A tape measure
- A pencil for marking
- A level to ensure everything is straight
One pro tip: Always pre-drill your holes using a drill bit that’s slightly smaller than your screws. This simple step makes driving the screws in much easier and prevents the wood from splitting, giving you a more secure fit.
The Hardware You’ll Need
Your new swing door latch kit should come with the main components, but it’s always good to double-check. You should have the latch mechanism, the strike plate (the metal piece that attaches to the door frame), and all the necessary screws. While most swinging doors also require hinges and handles, we’re focusing just on the latch for this guide.
This is also a great time to think about your security needs. A simple latch is great for convenience, but you might consider a more robust lock for added peace of mind. Upgrading your residential locksmith hardware with deadbolts or even a swing bar lock can work with your existing setup to provide an extra layer of protection.
Step 1: Remove the Old Latch
Alright, first things first: let’s get that old latch off the door. Taking a moment to do this carefully will save you a lot of headaches later and set you up for a smooth installation. The goal is to create a clean slate for your new hardware without accidentally scratching or gouging your door or frame in the process. It’s a straightforward step, but being patient here is key. Before you grab your screwdriver, take a quick look at the entire lock area to see exactly what you’re working with.
A Quick Guide to Safe Removal
To get started, you’ll want to clear the way for an easy removal. If you have any extra hardware like a chain lock or a slide bolt near the old latch, take those off first. This gives you an unobstructed workspace and prevents anything from getting snagged. Once the area is clear, you can focus on the main latch. Use a screwdriver that fits the screw heads properly to avoid stripping them. Carefully turn each screw counter-clockwise to loosen and remove it. Keep all the old parts in one place so you don’t misplace them, just in case you need to reference them later.
How to Avoid Damaging Your Door
The last thing you want is to damage your door while trying to improve its security. To prevent this, work slowly and avoid using excessive force. If a screw is stuck, try a drop of lubricant before giving it another go. It’s also a good idea to inspect the door and frame for any underlying issues like rot or warping before you begin. A weak frame can make any new installation difficult. If you notice significant problems, you might need professional door repair and installation to ensure your new latch is secure. When in doubt, it never hurts to have a friend help you hold things steady.
Step 2: Position and Mark for the New Latch
With the old hardware out of the way, it’s time to get your new latch perfectly placed. This step is all about precision. Taking a few extra minutes to get your measurements and markings just right will save you a ton of headaches later. A misaligned latch won’t close properly, can damage your door frame, and won’t provide the security you need. So, grab a pencil and a level, and let’s make sure everything lines up perfectly before you pick up the drill.
Getting the Measurement and Alignment Just Right
First things first, take a good look at your door and frame. Before you even think about installing the new latch, it’s smart to inspect the frame for any signs of warping, rot, or weakness. A brand-new latch won’t do you much good on a compromised frame. If you notice any issues, you might need professional door repair before moving forward. Assuming your frame is in good shape, hold the new latch against the door where you plan to install it. Use a small level to ensure it’s perfectly straight. You want the latch bolt to line up smoothly with the strike plate on the frame, so there’s no sticking or friction when you close the door.
How to Mark Your Drill Points
Once you’ve found the perfect spot for your latch, hold it steady with one hand. With your other hand, use a sharp pencil to carefully mark the center of each screw hole directly onto the door. A clear, precise mark is your best friend here. Now, do the same for the catch, or strike plate, on the door frame. Close the door to see where the latch arm will naturally rest and mark the screw spots on the frame. Double-check that your marks on the door and frame align perfectly. It’s the classic “measure twice, cut once” rule, but for drilling. Taking a moment to confirm your marks will ensure a secure and functional installation.
Don’t Forget to Check Your Door’s Thickness
This is a small detail that can make a big difference. Doors, especially in older NYC apartments, aren’t always a standard size. Swing doors are often customizable, which means they can have varying widths. Before you get too far, confirm that the latch you bought is compatible with your door’s thickness. The screws that come with the hardware need to be long enough to secure the latch firmly but not so long that they go all the way through the other side. Most latch packaging will list the compatible door thickness. If you find yourself with a non-standard door and are struggling to find hardware that fits, a residential locksmith can help source the right parts for the job.
Step 3: Drill and Attach the Latch
You’ve done the prep work, and your markings are ready. Now for the satisfying part: installing the new latch. This step is all about precision, as it ensures your new latch works smoothly from day one. We’ll break it down into drilling the pilot holes, attaching the latch, and installing the strike plate on the frame. If you run into any trouble with a tricky door frame, our emergency locksmith team is always here to help.
Tips for Drilling Clean Pilot Holes
Before you drive in any screws, you need to drill pilot holes. This is a non-negotiable step that prevents the wood from splitting and ensures a secure fit. The trick is to use a drill bit that is slightly smaller than your screws, which helps them go in straight and easy. Hold your drill steady and perpendicular to the door’s surface, applying even pressure. Rushing this part can lead to crooked screws or damaged wood. Clean, well-drilled pilot holes are the foundation for a professional-looking installation that will last.
Securely Fasten the Latch
With your pilot holes ready, it’s time to attach the latch. Position the main body of the latch over the holes on your door. Start by loosely inserting each screw, and make sure everything is lined up before you tighten the screws all the way. This gives you a little wiggle room for final adjustments. Once you’re confident in the alignment, tighten the screws until they’re snug. A properly installed latch should sit flush against the door. If your door is warped, it can make alignment tricky, and sometimes a professional door repair is the best solution.
Install the Strike Plate
The final piece is the strike plate—the metal plate on the door frame where the latch bolt will sit. Alignment is everything here. You need to install the strike plate carefully, aligning it precisely with the door latch. Hold it in place and close the door slowly to check that the opening lines up exactly with the latch bolt. Once you’ve found the sweet spot, mark your drill points, drill your pilot holes, and then screw the plate securely into the frame. A precisely installed strike plate ensures your door latches smoothly every time you close it.
Step 4: Test Your Work
You’re on the home stretch! This final step is your quality check, and it’s just as important as the installation itself. Taking a few minutes to test your new swing door latch ensures it works smoothly and securely, saving you from future frustration. Before you put your tools away, you need to confirm that everything is aligned perfectly and operating without a hitch. Even the most careful installation can result in minor misalignments that cause the latch to stick or not close properly.
The goal here is to catch any issues while they’re still easy to fix. We’ll walk through how to check for smooth operation and what to do if things aren’t quite right. A properly functioning latch should engage effortlessly, without you needing to push, pull, or jiggle the door. If you find yourself fighting with the door to get it to close, it’s a sign that a small adjustment is needed. Sometimes, the issue isn’t the latch at all but a sagging door, which points to a different problem. If you suspect the door itself is the culprit, it might be time to look into professional door repair and installation. This final check is what separates a good DIY job from one that will need fixing again in a few months. It ensures the security of your home or business is not compromised by a faulty latch.
Check for Smooth Operation and Proper Alignment
Before you tighten all the screws down completely, give your new latch a test run. Open and close the door several times. Does the latch bolt slide easily into the strike plate on the door frame? It should click securely into place without any extra force. Now, turn the handle or knob. The latch should retract fully and smoothly. If you feel any grinding, sticking, or resistance, something is off.
Proper alignment is key here. The latch bolt should line up perfectly with the center of the strike plate opening. If it hits the top or bottom of the plate, it will wear down over time and may eventually fail to lock. This simple check prevents unnecessary strain on the mechanism and your door frame.
Make Any Final Adjustments
If the latch isn’t operating perfectly, don’t worry—the fix is usually simple. First, check your screws. Hardware that is screwed in too tightly can cause the internal mechanism to bind. Try loosening the screws slightly and see if that helps. If the latch is misaligned with the strike plate, you may need to reposition the plate. Loosen its screws and move it slightly up, down, or side-to-side until the latch engages smoothly.
Sometimes, the hole in the door frame behind the strike plate needs to be a tiny bit larger. You can carefully file it to create more room. Make small adjustments and test after each one. Getting this right ensures your door closes securely every time.
Troubleshooting Common Installation Issues
Even with the best preparation, you can sometimes hit a snag during a DIY project. It’s completely normal! Installing a new swing door latch is usually straightforward, but things like an older door, a settled house frame, or tiny measurement errors can create unexpected challenges. The good news is that most of these issues are fixable with a little patience and know-how. Before you get frustrated, take a deep breath and let’s walk through some of the most common problems and how to solve them.
From a latch that just won’t line up with the strike plate to a door that seems to have sagged over time, we’ve got you covered. We’ll look at what to do when your new hardware doesn’t quite fit the old cutouts and how to handle a door or frame that’s seen better days. Most of these fixes are simple adjustments, but knowing what to look for is half the battle. And remember, if a problem feels too big to handle, our team is always ready to provide emergency locksmith services to get your door secure and working perfectly.
Fixing Misalignment or Measurement Errors
One of the most frequent issues is a misaligned latch—it just doesn’t catch properly in the strike plate on the door frame. This often happens when the new latch sits just a millimeter or two off from the old one. To diagnose the problem, try closing the door slowly and watching exactly where the latch bolt hits the strike plate. A simple trick is to apply a bit of lipstick or a dry-erase marker to the end of the bolt. When you close the door, it will leave a mark showing you exactly where you need to make an adjustment. You can often fix this by filing the opening of the strike plate slightly wider or by repositioning the plate itself.
Dealing with a Sagging Door or Loose Hinges
If your latch and strike plate seem to be at different heights, the problem might not be the latch at all—it could be a sagging door. Over time, doors can settle in their frames, or hinges can become loose, causing the entire door to droop. Before you adjust the latch, check the door’s hinges. Are all the screws tight? If a screw just spins in its hole, it’s stripped. You can fix this by using a slightly longer screw or by filling the hole with wood putty and a toothpick before re-drilling. If tightening the hinges doesn’t solve the sag, you might have a more significant issue with the door or frame that requires professional door repair and installation.
What If Your New Hardware Doesn’t Fit?
It can be frustrating to discover that your shiny new latch doesn’t fit into the existing holes and cutouts in your door. This is common in older homes or when you’re switching between different hardware brands that have unique specifications. If the latch plate is too big for the mortise (the recessed area on the door’s edge), you’ll need to carefully chisel the opening a little larger. If it’s too small, you can fill the gaps with wood putty for a snug fit. The key is to avoid forcing the hardware, as this can damage both the lock and your door, compromising its security.
Working with Worn-Out Doors or Frames
Installing new hardware on an old, worn-out door presents its own set of challenges. The wood might be brittle, screw holes from previous installations could be stripped, and the frame might be warped. When fastening the new latch, be careful not to overtighten the screws, which can crack the wood. If you’re dealing with stripped screw holes, use wood filler to create a solid base before drilling new pilot holes. Keep in mind that if a door or its frame is severely damaged, a new latch is only a temporary fix. For a lasting solution that keeps your home secure, it’s best to have a residential locksmith assess the door’s overall condition.
A Few Safety Tips Before You Start
Before you grab your drill, let’s talk about a few things that will make this project go smoothly and safely. I know it’s tempting to jump right in, but a little prep work goes a long way in preventing headaches later. Taking a few minutes to get organized and prioritize safety ensures your new latch works perfectly and you don’t end up with a bigger problem than you started with. These simple tips will help you work like a pro, even if it’s your first time tackling a project like this.
Prep Your Space and Use Protective Gear
First things first: safety. It might sound basic, but it’s easy to forget when you’re focused on the task. Always wear safety goggles to protect your eyes from wood or metal shavings and a good pair of gloves to prevent splinters and cuts. Trust me, a trip to the emergency room is not the desired outcome here. It’s also a great idea to clear your workspace. Move any rugs, furniture, or stray objects out of the way so you have plenty of room to move around without tripping. A clean, organized space helps you focus and keeps everything you need within easy reach.
Why Quality Materials and Proper Tools Matter
The latch you choose is your first line of defense, so this isn’t the place to cut corners. A cheap, flimsy lock can fail when you need it most, compromising the security of your home or business. Quality hardware is built to last and withstand tampering. Locks are critical for ensuring the security of swing doors, and they come in various styles, from deadbolts to mortise locks. Using the right tools for the job is just as important. A drill with the correct bit size, a sharp chisel, and a sturdy screwdriver will make the installation cleaner and more secure. Investing in good materials provides peace of mind and is essential for effective residential security.
The Importance of Keeping Things Level
One of the most common mistakes in any door hardware installation is taking incorrect measurements. A latch that’s even slightly off-kilter won’t catch properly, making it difficult to close or lock your door. Always follow the old rule: measure twice, drill once. Use a level to ensure your markings for the latch and strike plate are perfectly aligned both horizontally and vertically. This precision is what separates a professional-looking job from a frustrating mess. If things aren’t lining up, it could be a sign of a bigger issue with the door itself, which might require professional door repair and installation to fix correctly.
Keep Your New Latch Working Like a Charm
You’ve successfully installed your new swing door latch—great job! Now, a little bit of upkeep will ensure it works smoothly for years to come. Just like any other hardworking part of your home, your door hardware needs some occasional attention to stay in top shape. A few simple checks can prevent minor annoyances from turning into bigger problems, keeping your door secure and easy to use. Think of it as a small investment of time that pays off in long-term peace of mind and functionality.
A Simple Maintenance Routine
Keeping your latch in good working order is easier than you think. Every few months, take a moment to check that the latch bolt lines up perfectly with the strike plate on the door frame; misalignment is a common source of trouble. While you’re at it, grab a screwdriver and gently tighten any loose screws on the latch, handle, and door hinges. A wobbly hinge can cause the entire door to sag, throwing the latch out of alignment. You can also wipe down the hardware and use a bit of graphite lubricant in the keyhole and latch mechanism to prevent sticking, especially as the seasons change. These small steps help prevent unnecessary wear and tear on your door hardware.
Signs It’s Time for a Repair or Replacement
Even with regular care, parts can wear out. It’s time to consider a repair or replacement if you notice a few key warning signs. Is the latch sticking, or do you have to jiggle the handle to get it to catch? Are the components loose, even after you’ve tightened the screws? Visible rust, cracks, or significant wear are also clear indicators that the latch is past its prime and may no longer be secure. A failing latch isn’t just an inconvenience; it can be a security risk. If you’re experiencing any of these issues, it’s often best to call a residential locksmith to assess the problem and install a reliable new lock.
Know When to Call a Professional
There’s a lot of satisfaction in completing a home project yourself, but there’s also wisdom in knowing when to pass the torch to an expert. When it comes to your home’s security, getting it right is what matters most. If you find yourself stuck or unsure, a professional locksmith can finish the job quickly and correctly, giving you peace of mind that your door is truly secure. It’s not about giving up; it’s about making the smart call for your home and safety.
When a DIY Project Gets Too Complicated
What looks like a simple latch installation can sometimes reveal deeper issues with your door or its frame. You might find that the door frame isn’t square, the floor isn’t level, or the door itself has warped over time. These underlying problems can make it nearly impossible to get the new latch and strike plate to align perfectly. If you’re forcing parts to fit or the latch isn’t catching smoothly, you’re compromising your security. Instead of getting frustrated, recognize that the project has become more complex than you anticipated. This is the perfect time to step back and call for professional help.
How Golden Key Locksmith NYC Can Help
If you’re facing a stubborn latch that just won’t align or a door that won’t close properly, our team is ready to help. A professional locksmith can quickly diagnose the root cause of the problem, whether it’s misalignment, worn-out parts, or a sticking mechanism. We have the specialized tools and experience to make precise adjustments, ensuring your latch functions smoothly and provides optimal security. Don’t let a tricky installation leave your home vulnerable. We handle all types of door repair and installation to make sure your home is safe and secure.
Related Articles
- The Door Latch Mechanism Explained: A Complete Guide
- How To Install A Door Latch Plate Perfectly
- 7 Door Latch Types: Which Is Right For You?
- Hidden Dangers: Everyday Items That Compromise Your Security
- 7 Reasons To Make An Appointment With Golden Key Locksmith NYC
- 5 Steps for Commercial Door Lock Indicator Installation
Frequently Asked Questions
What’s the real difference between a door latch and a deadbolt? Think of it this way: a latch is what holds your door closed, while a deadbolt is what locks it for security. The latch is the spring-loaded part connected to your doorknob that clicks into the frame, keeping the door from swinging open. A deadbolt is a solid metal bolt that you manually extend with a key or thumbturn, providing a much stronger barrier against forced entry. For solid security, you really need both working together.
How long should this project actually take me? If you’re replacing a latch with a similar model and don’t run into any surprises, you can likely get this done in under an hour. However, if you need to drill new holes, chisel the door edge, or deal with a misaligned frame, it could take longer. The key is to set aside enough time so you don’t have to rush through the crucial steps of measuring and aligning everything perfectly.
My door seems to be sagging, and that’s why the latch won’t line up. Will a new latch fix this? A new latch won’t solve a sagging door, which is usually a sign of a different problem. The issue is most likely with loose hinges or a door frame that has settled over time. Before you replace the latch, check if tightening the hinge screws helps pull the door back into alignment. If that doesn’t work, the door itself may need professional adjustment to ensure any new hardware can function securely.
Can I just use the same screw holes from the old latch? Using the existing screw holes is ideal, as it makes for a quick and easy swap. This is often possible if you’re replacing the latch with the exact same model. However, if your new hardware has a different size or screw pattern, you will need to drill new pilot holes. If the old holes are visible after installing the new latch, you can fill them with wood putty and touch them up with paint for a clean finish.
What if my door is metal instead of wood? Is the process the same? Installing a latch on a metal door is a different process that requires specific tools. You’ll need drill bits designed for metal and self-tapping screws to secure the hardware properly. Attempting to use standard wood screws can damage the door and result in a latch that isn’t secure. If you’re not comfortable drilling into metal, it’s a good idea to call a professional to handle the installation.
Need professional help in NYC? Contact Golden Key Locksmith NYC for Commercial Door Services or Metal Door Installation. Available 24/7 across Manhattan and all NYC boroughs.